Google is a gold mine being mined by just about everybody, only with this guide can you expect to make big earnings with ease. No matter who you are, if your a seasoned pro or a complete beginner this guide will show you how to make easy money from Google with “Google adwords and adsense easy money profits”. Google will be your new ATM just spewing out cash in to your wallet with this guide, It has taken years of research by trial and error to create methods and strategies to Google in to an automated cash cow.. we have sifted through all other products on the market for this information and have compiled only the very best info for this guide. We have also streamlined it and made it easy for beginners to understand.
http://adnetworkguide.com/Sunday, 1 December 2013
Guide to Google Adwords and Adsense Easy Money Profits
Google is a gold mine being mined by just about everybody, only with this guide can you expect to make big earnings with ease. No matter who you are, if your a seasoned pro or a complete beginner this guide will show you how to make easy money from Google with “Google adwords and adsense easy money profits”. Google will be your new ATM just spewing out cash in to your wallet with this guide, It has taken years of research by trial and error to create methods and strategies to Google in to an automated cash cow.. we have sifted through all other products on the market for this information and have compiled only the very best info for this guide. We have also streamlined it and made it easy for beginners to understand.
http://adnetworkguide.com/Sunday, 21 April 2013
Pre-pottery
Pre-Pottery Neolithic B (PPNB) is a division of the Neolithic developed by Dame Kathleen Kenyon during her archaeological excavations at Jerichoin the southern Levant region.
Cultural tendencies of this period differ from that of the earlier Pre-Pottery Neolithic A period in that people living during this period began to depend more heavily upon domesticated animals to supplement their earlier mixed agrarian and hunter-gatherer diet. In addition the flint tool kit of the period is new and quite disparate from that of the earlier period. One of its major elements is the naviform core. This is the first period in which architectural styles of the southern Levant became primarily rectilinear; earlier typical dwellings were circular, elliptical and occasionally even octagonal. Pyrotechnology was highly developed in this period. During this period, one of the main features of houses is evidenced by a thick layer of white clay plaster floors highly polished and made of lime produced from limestone. It is believed that the use of clay plaster for floor and wall coverings during PPNB led to the discovery of pottery.[1] Indeed, the earliest proto-pottery was White Ware Vessels, made from lime and gray ash, built up around baskets before firing, for several centuries around 7000 BC at sites such as Tell Neba'a Faour (Beqaa Valley).[2] Sites from this period found in the Levant utilizing rectangular floor plans and plastered floor techniques were found at Ain Ghazal, Yiftahel (western Galilee), and Abu Hureyra (UpperEuphrates).[3] The period is dated to between ca. 10700 and ca. 8000 BP or 7000 - 6000 BCE.
Danielle Stordeur's recent work at Tell Aswad, a large agricultural village between Mount Hermon and Damascus could not validate Henri de Contenson's earlier suggestion of a PPNA Aswadian culture. Instead, they found evidence of a fully established PPNB culture at 8700 BC at Aswad, pushing back the period's generally accepted start date by 1200 years. How a PPNB culture could spring up in this location, practicing domesticated farming from 8700 BC has been the subject of speculation. Whether it created its own culture or imported traditions from the North East or SouthernLevant has been considered an important question for a site that poses a problem for the scientific community.[4][5][6][7][8][9][10][11]
Like the earlier PPNA people, the PPNB culture developed from the Earlier Natufian but shows evidence of a northerly origin, possibly indicating an influx from the region of north eastern Anatolia. The culture disappeared during the 8.2 kiloyear event, a term that climatologists have adopted for a sudden decrease in global temperatures that occurred approximately 8200 years before the present, or c. 6200 BCE, and which lasted for the next two to four centuries. In the following Munhatta and Yarmukian post-pottery Neolithic cultures that succeeded it, rapid cultural development continues, although PPNB culture continued in the Amuq valley, where it influenced the later development of Ghassulian culture.
Work at the site of 'Ain Ghazal in Jordan has indicated a later Pre-Pottery Neolithic C period which lasted between 8200 and 7900 BP. Juris Zarinshas proposed that a Circum Arabian Nomadic Pastoral Complex developed in the period from the climatic crisis of 6200 BCE, partly as a result of an increasing emphasis in PPNB cultures upon animal domesticates, and a fusion with Harifian hunter gatherers in Southern Palestine, with affiliate connections with the cultures of Fayyum and the Eastern Desert of Egypt. Cultures practicing this lifestyle spread down the Red Sea shoreline and moved east from Syria into Southern Iraq.[12]
ow we pack pottery for shipping
We have shipped pottery from our studio to locations around the World. We have shipped pottery to Florida, Maine, New York, Alaska, Texas, Hawaii, and all across Canada by bus, mail, and courier. Since most carriers will not insure something they consider fragile other than to guarantee the box will arrive at its final destination, our packing is our insurance. Statistically we have zero breakage. In over tenyears of shipping literally tons of pottery we have had a total of less than 10 pieces broken in shipment. We guarantee our shipments will arrive unbroken, and we replace anything broken in shipment. The following is a step by step look at how we pack pottery. In this case we are packing a four cubic foot, 18 inch x 18 inch x 24 inch box, with 18 mugs and a 12 inch bowl.
Clicking on a "thumbnail" picture will give you a larger image.

We start with a roll of 12 inch wide single face corrugated cardboard. Every piece of pottery will be individually wrapped in cardboard.

Here a piece of cardboard has been cut the proper length to wrap a mug.
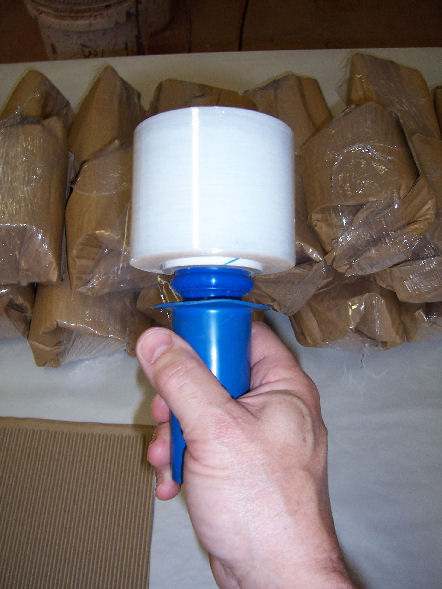
Stretch film plastic is used instead of tape . Not only is it easy to apply but when the recipient opens the parcel it is much easier to open. This way there is much less chance of breakage. Also for recycling purposes the cardboard remains clean.
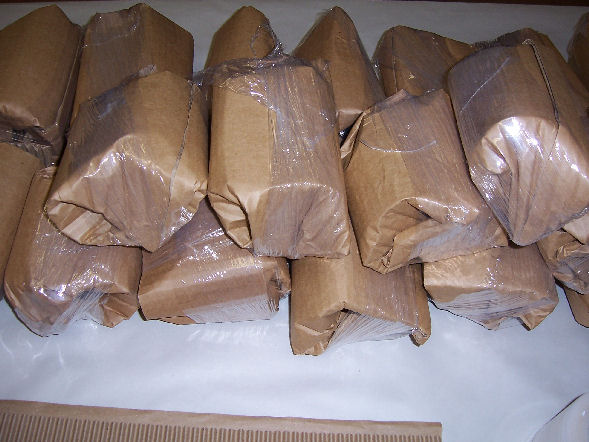
Each mug is wrapped in its own protective covering so no pottery surface can contact another.
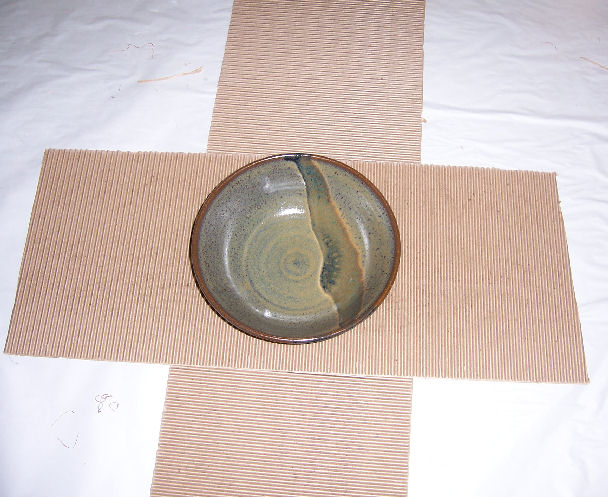
Bowls receive the same cardboard cover. In this case the cardboard is wrapped in both directions.
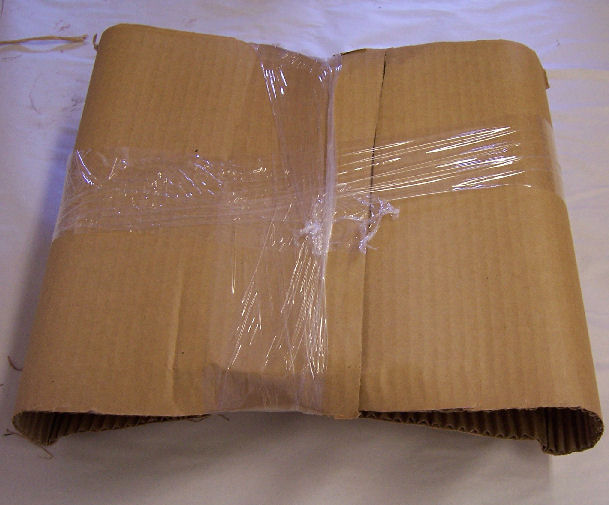
The cardboard wrapped bowl is protected from contact with any other piece of pottery.
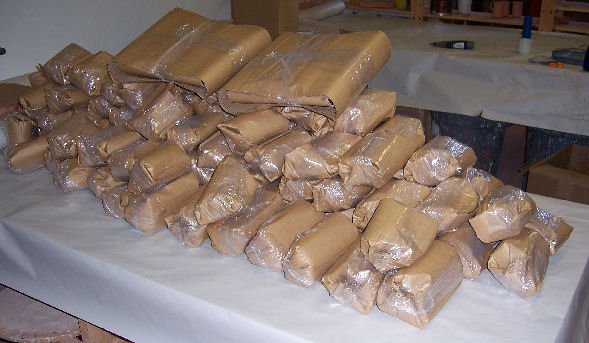
Here is the complete order of 100 mugs and 2 twelve inch bowls ready to be packed.
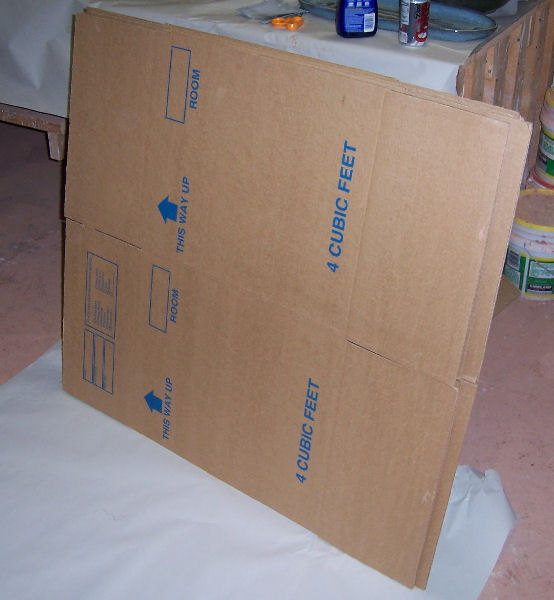
These 18 x 18 x 24 inch tall boxes are purchased new. We always use new boxes to ship as reused boxes tend to be "tired" and look tired. Also, when a parcel has a professional appearance there is a very good possibility it will receive professional handling on its journey.
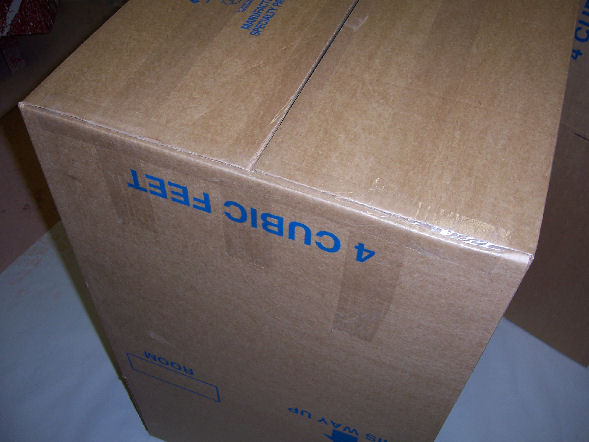
Packing tape is used to close the box with three strips. One at the center seam, one across the center of each flap then a strip to seal the ends of the flaps so there are no loose edges to catch when the box is sliding or being handled.
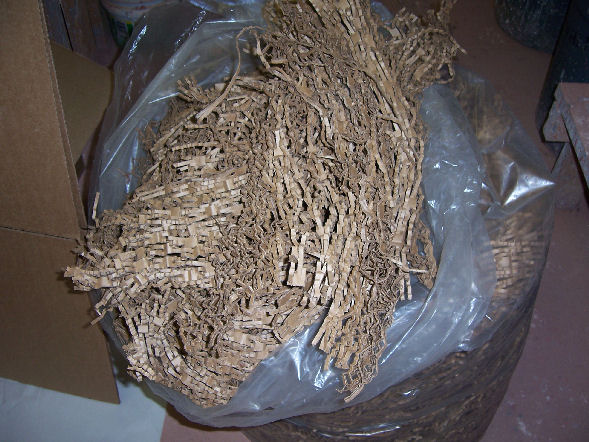
We used "Enviropack" perforated cardboard for packing in boxes as cushioning around the sides and ends and between pieces as required. It is 100% recyclable, bio-degradable, and works well to fill voids and hold and cushion the pots. We purchased it in 16 cubic foot bags from Specialty Packaging in Edmonton. Specialty Packaging closed in late 2008 and we have not found another source for this material. We are currently using biodegradable (soy based) "peanut" packaging..
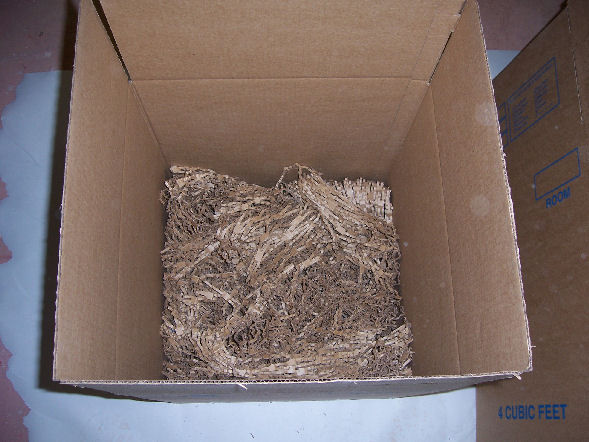
First we place four or five inches of uncompressed enviropack (now peanuts) in the bottom of the container.

Nine to twelve mugs will fit in one layer. They are fit snugly against each other and then panuts are pushed into the area between the mugs and the container walls.

One of the twelve inch bowls is set on top of the mugs.

A final layer of packing is added. It is packed firmly around the bowl and slightly overfills the box.
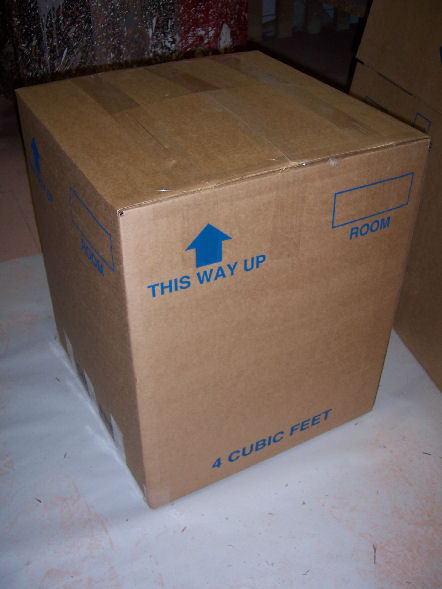
The packing is pressed down into the box and the top flaps are sealed in a manner similar to the bottom. Three strips of packing tape are used. One across the center seam where the flaps meet and one across the center of each flap. Two other strips are used to seal the ends of the flaps to prevent any edges catching when the box is sliding or being handled.
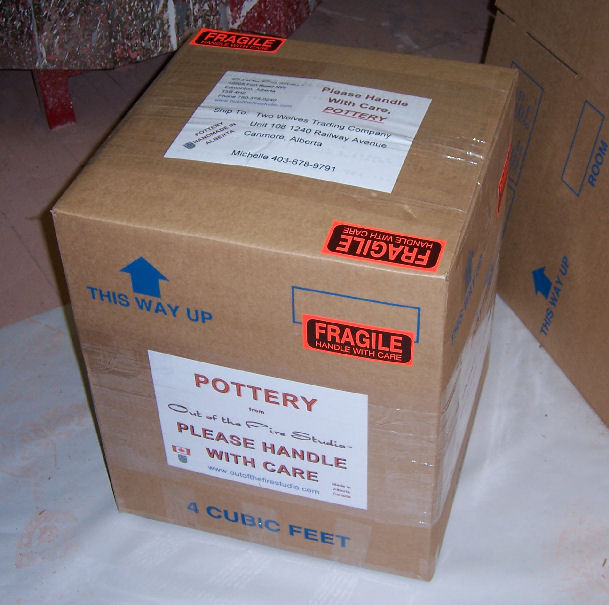
Labels and stickers are applied. The shipping label is completely covered with tape to prevent any moisture from causing the ink to run. Fragile stickers are applied on all sides as well as our personal label announcing another pottery shipment from Out of the Fire Studio. These make it very clear the contents are breakable pottery. These boxes have a label which points to the top of the box and says this side up, but this is a guideline, not a rule. When a box is being handled by automated equipment, or when room is tight in a van or trailer, up may become sideways or even down. We always assume the box will sit on any of its sides at some time during shipment. An industry standard is that the box be capable of falling four feet onto a concrete surface without breaking. We have never actually tested the concept but as we said earlier our pots are delivered unbroken, time after time.
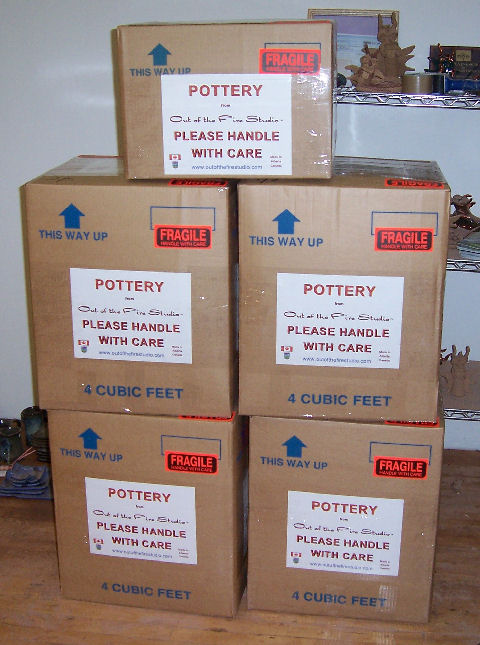
Here is the complete shipment ready to go. 151 pounds of pottery in five containers. This shipment is going by bus so it will travel on one waybill. If it was being mailed each box would be shipped separately.
Do's and Don'ts of Packing
Do use new materials. Do wrap each piece separately. Do snugly fill each box. Do have at least 4 inches of cushioning between the product and the box. Do tape down all loose edges. Do label clearly. Do a professional job. Do be environmentally friendly.
Don't use old boxes. Don't use newspaper. (Newsprint ink smudges your products and the customers hands and clothing). Don't overload the box (for example these four cubic foot boxes usually hold 30 to 40 pounds of pottery maximum). Don't leave anything loose to rattle around. Don't cut corners. An extra five dollars on packaging is cheap insurance.
Glazing and firing pottery
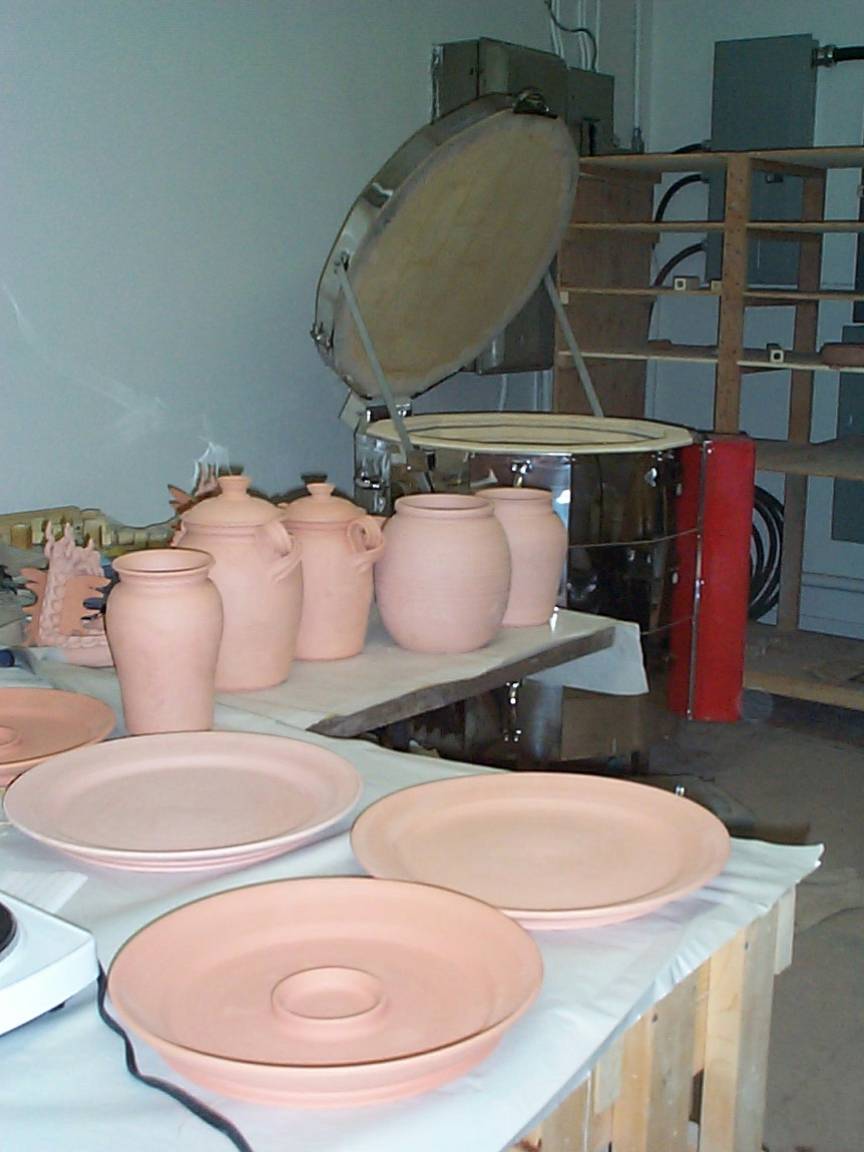
After the pot is completely dry it is ready to be bisque fired. This initial firing removes the physical and chemical water so that the piece can be glazed without returning to mud and breaking. The temperature we bisque at is approximately 1700 degrees Fahrenheit. Many potters prefer to bisque at a higher temperature as more impurities are forced from the clay, however for the glazes we use this temperature works well. Bisque pottery made from our red Alberta clays takes on a terra cotta appearance, similar to the flower pots you see in a florist's shop.
(Click for a larger image)
| 
(Click for a larger image)
|
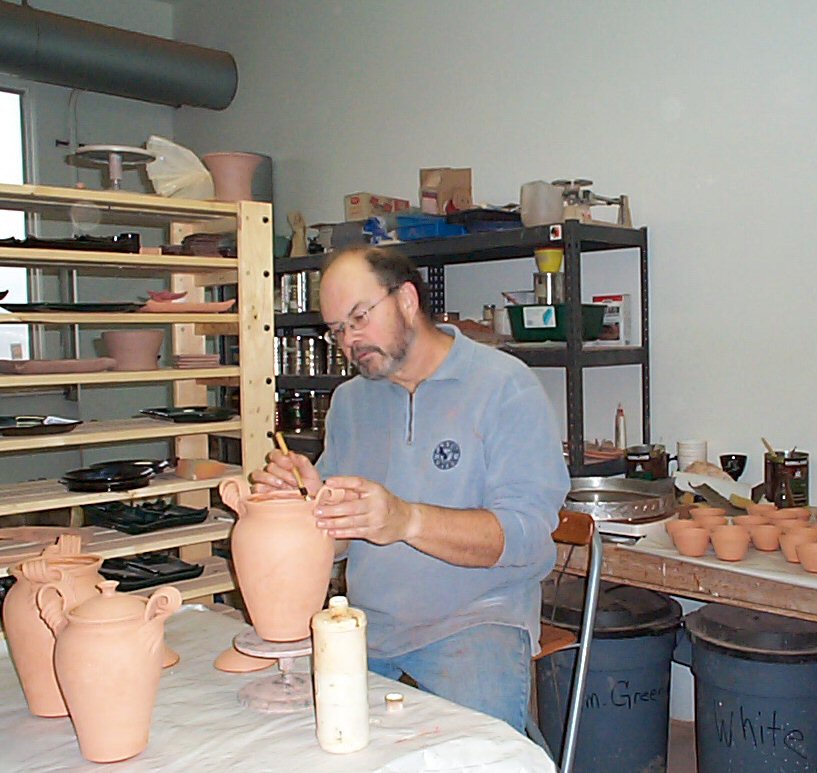
The next stage in the creation of the pot is the application of glaze. Every potter has his or her own formulation for glazes and many of these are a closely guarded secret as the unique properties imparted by a particular glaze fired on a particular clay body, combined with the characteristics of the design of the piece are what identifies the pot as belonging to a certain potter. However, before we apply the glaze we must prepare the piece.
First we check the pot and remove any bumps or imperfections we see. We may use a 100 grit sandpaper or a kitchen paring knife edge to smooth surfaces. We then sponge the entire surface of the pot to remove any dust left from sanding to provide a clean surface for the glaze to adhere to.
(Click for a larger image)
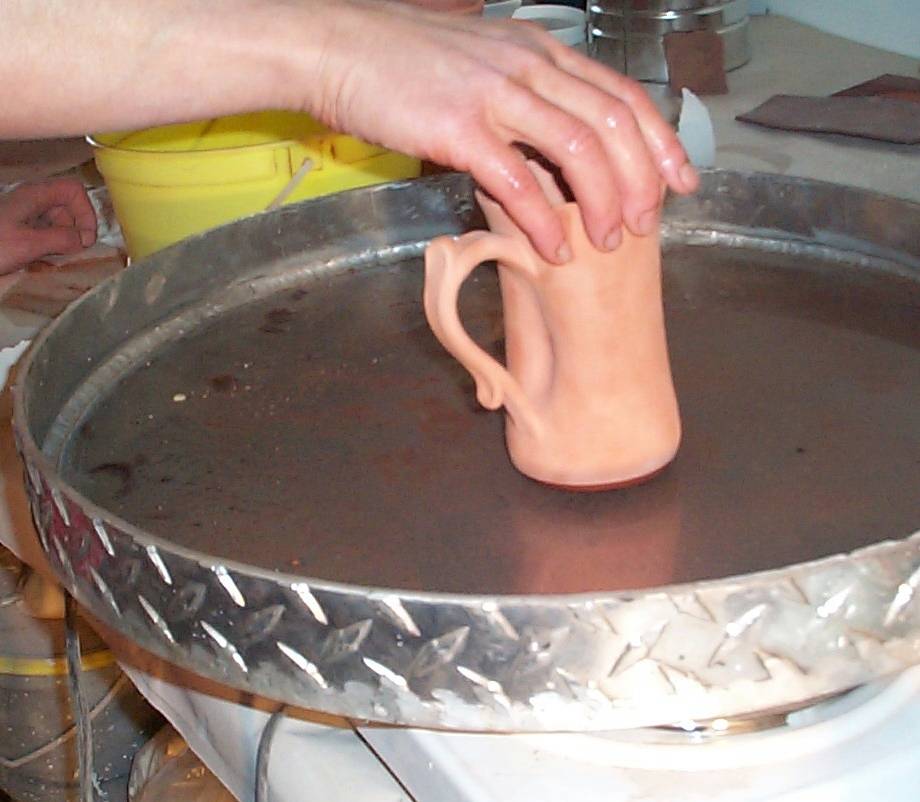
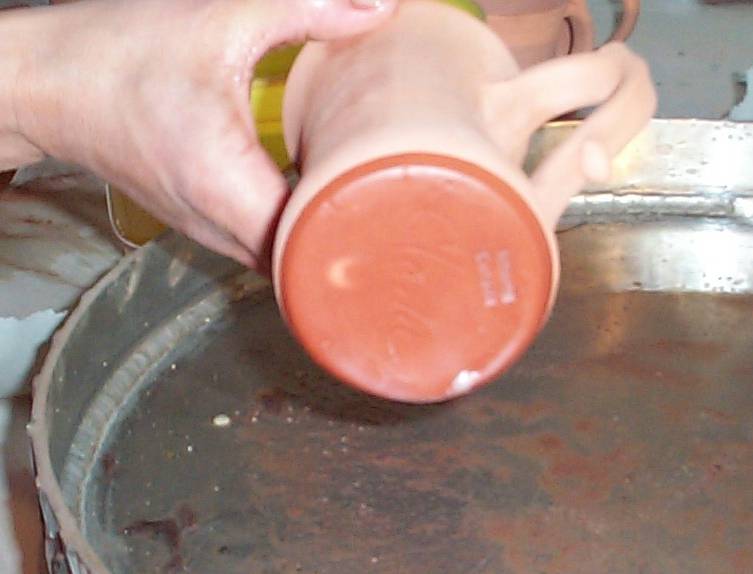
Next the bottom of the pot is placed in a pan of paraffin wax so no glaze will stick to this area. If we glazed the bottom the pot would become a permanent part of the kiln shelf, and that's not a good thing! Some potters prefer to use a water based wax which has the advantage of not requiring heat nor smelling strongly as paraffin does. Other potters just wash the glaze off the bottom of the pot.
 |  |
(Click for a larger image)
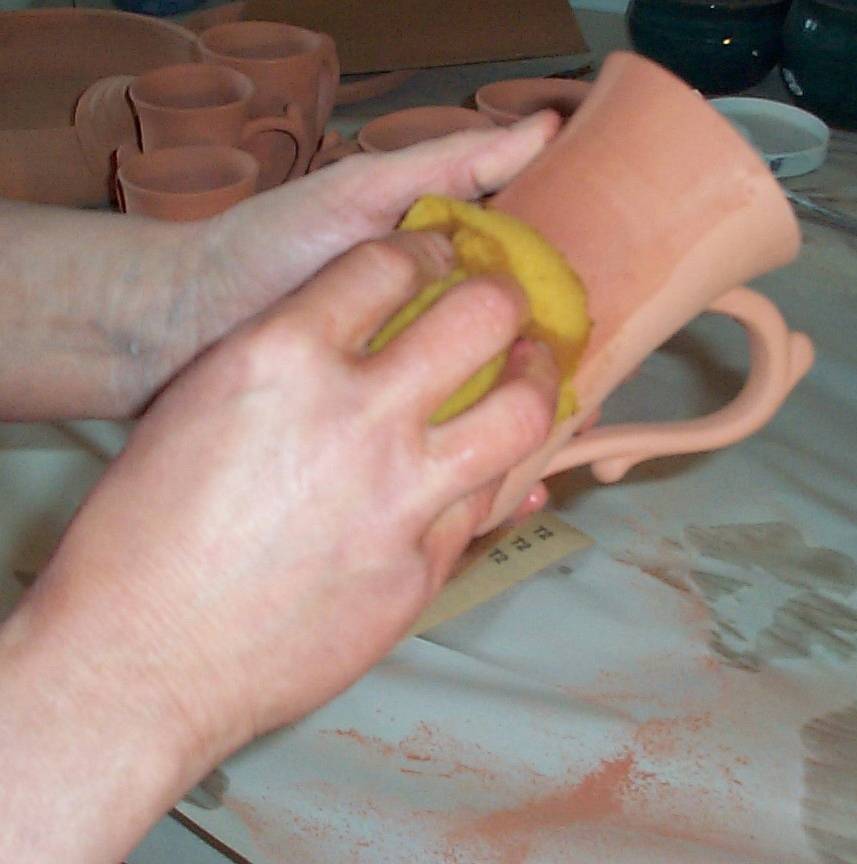
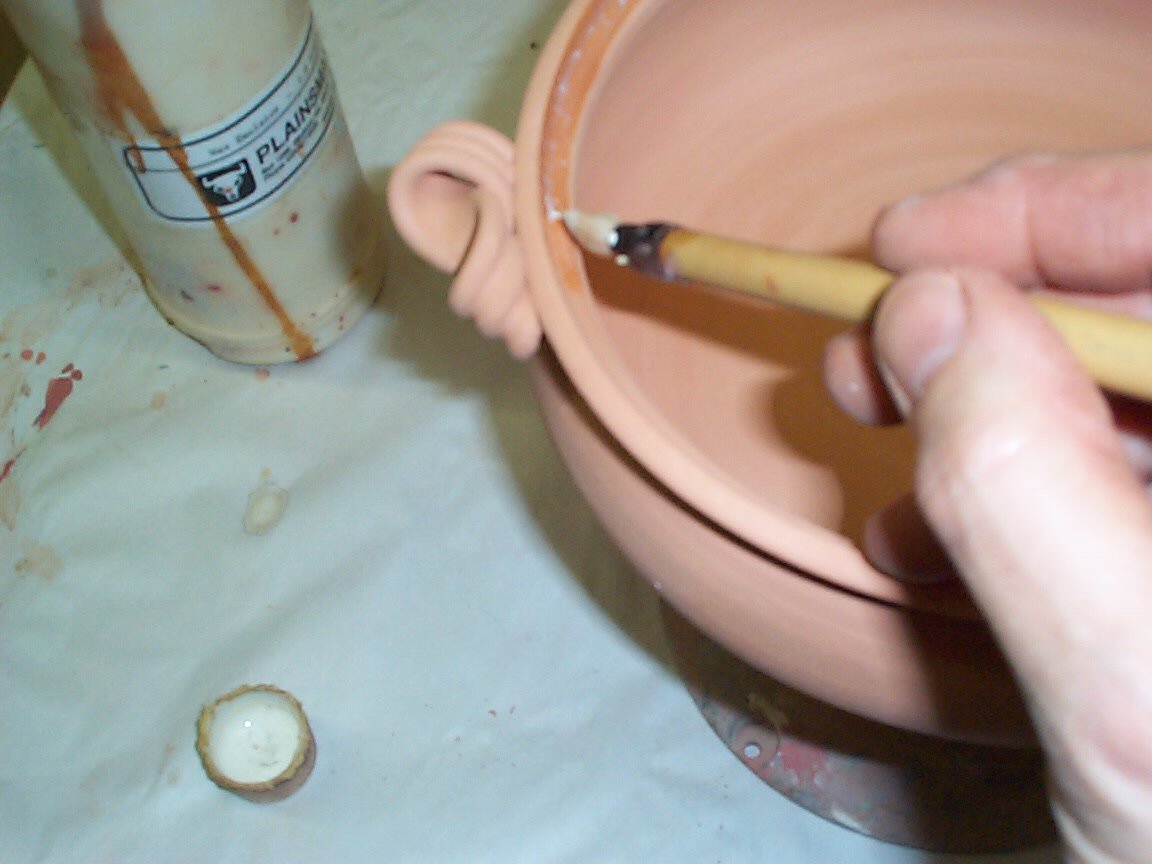
If the pot has a lid, such as a casserole or bean pot for example, we apply a wax emulsion with a brush to the areas where the lid and pot meet. This keeps the glaze from the lid and pot from melting together and forming a solid sculpture with the lid bonded firmly in place!
 |  |
(Click for a larger image)
Glaze can be applied by several methods but we prefer to dip our pots into a container of glaze. Next, using dipping tongs the pot is totally submerged in glaze, lifted out and set aside until it dries. Notice how no glaze adheres to the waxed area.

(Click for a larger image)
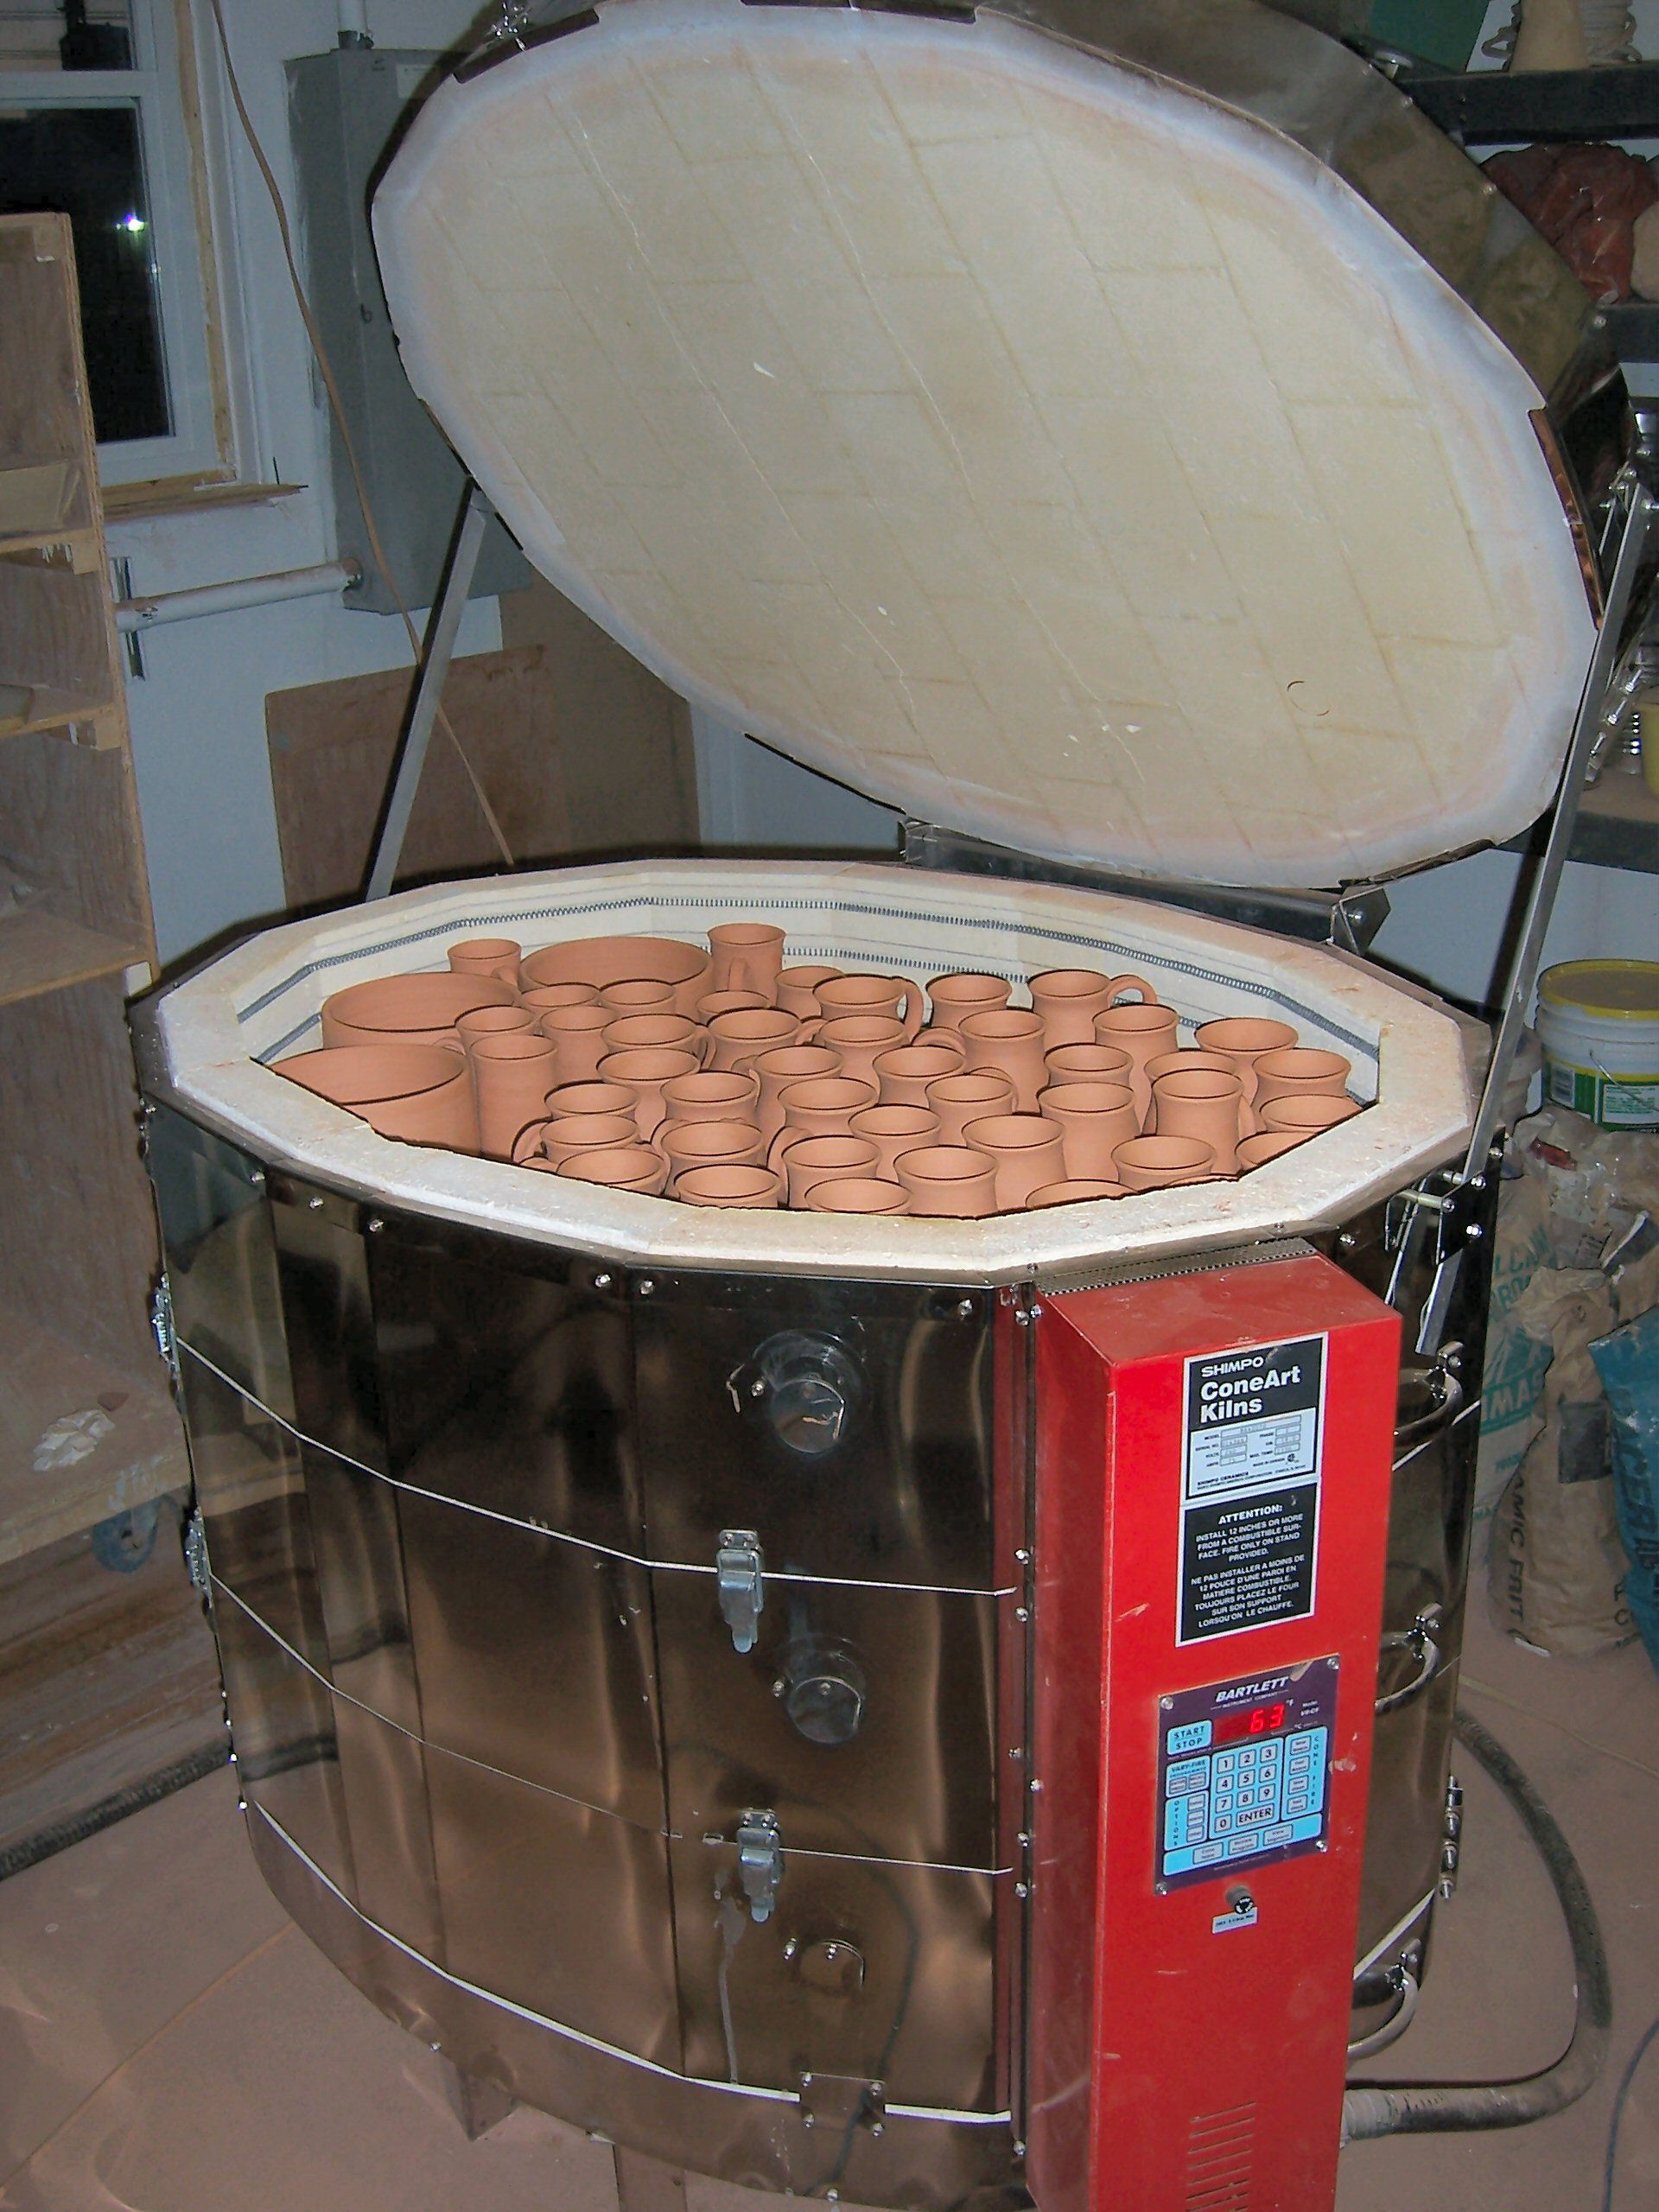
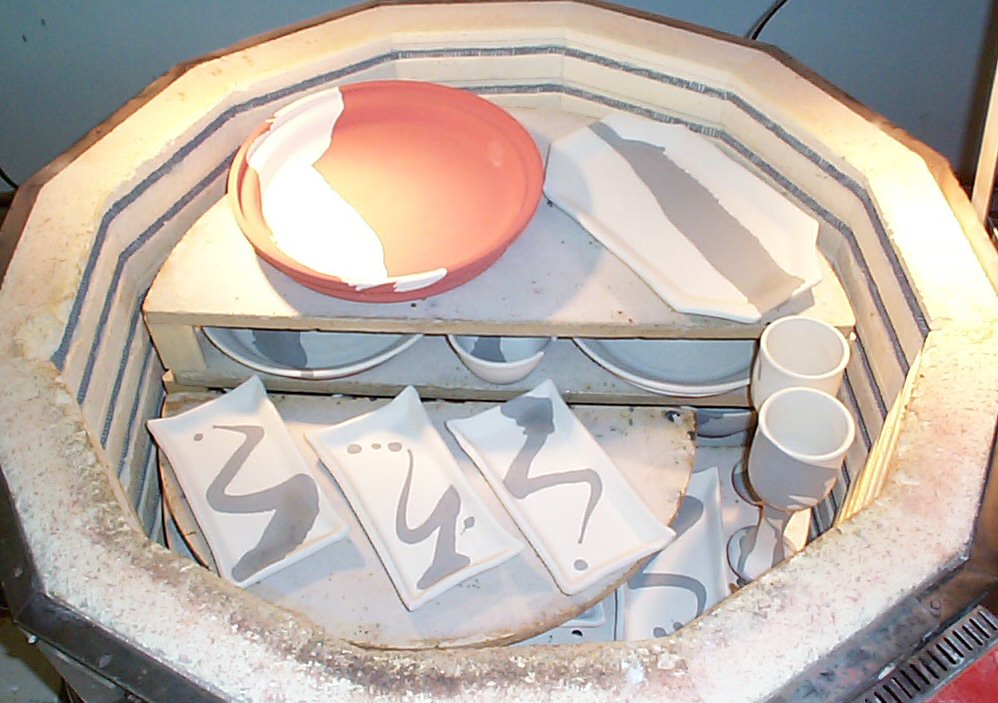
Once the pot is glazed, it is returned to the kiln for a second firing, in which the clay and the glaze are matured, meaning stoneware is brought to a temperature at which it is no longer porous and the glaze achieves a glasslike finish. In the case of our pots which are fired in an oxidation environment in computer controlled electric kilns this temperature is over 2100 degrees Fahrenheit. This final temperature is decided by trial and error and is again influenced by the nature of your clay body and the glazes you use. Kilns can be fired to cone or temperature. We have our own firing schedule which allows us to fire to temperature over a specified time in controlled increments.
(Click for alarger image)
After achieving the desired temperature the pots are allowed to slowly cool over the next 24 hours before the kiln is opened and we see the finished pot for the first time. In some ways every time is like the first time as the "Kiln Gods" can sometimes really surprise you. You can find many photo books online of different effects that can take place when pottery comes out of a kiln. The finished pot is then given a final sanding and dusting before being packed for shipping.
Throwing, drying and trimming
Every wheel thrown pot comes from a cylinder. Vases are tall thin ones and plates are short fat ones but they all begin as a cylinder, and bowls are no exception.
(Click for a larger image)
The cylinder is drawn to the desired height and then shaping begins.Cindy demonstrates throwing a bowl with the Perfect Profile Rib..
Here's a video of the Perfect Profile Rib being used on a large plate.
(Click for a larger image)
Excess water is removed from the bowl with a sponge which also smoothes the surface and contributes to the strength of the finished bowl when it is in your kitchen environment.
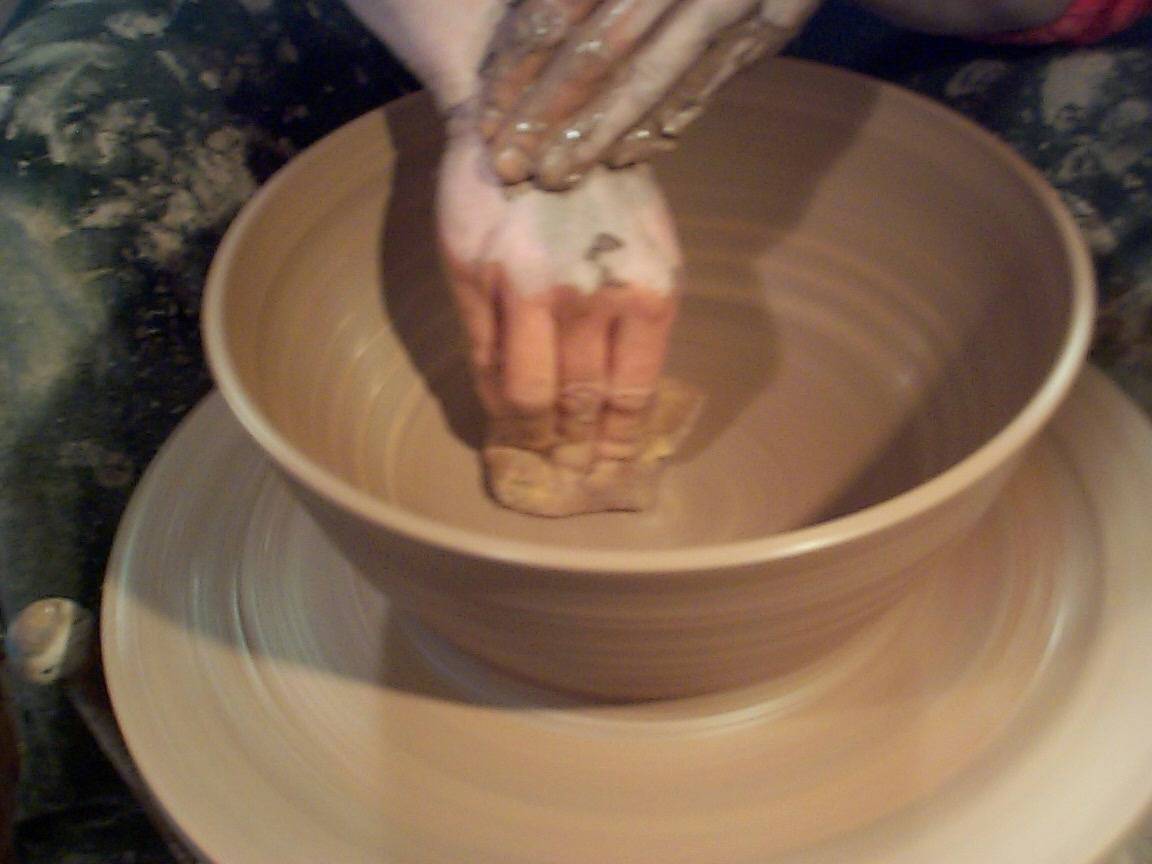
(Click for a larger image)
The freshly thrown bowl is then removed from the wheel and allowed to dry to a "leather hard" state at which point it can be trimmed to remove excess clay from the bottom and establish a foot.
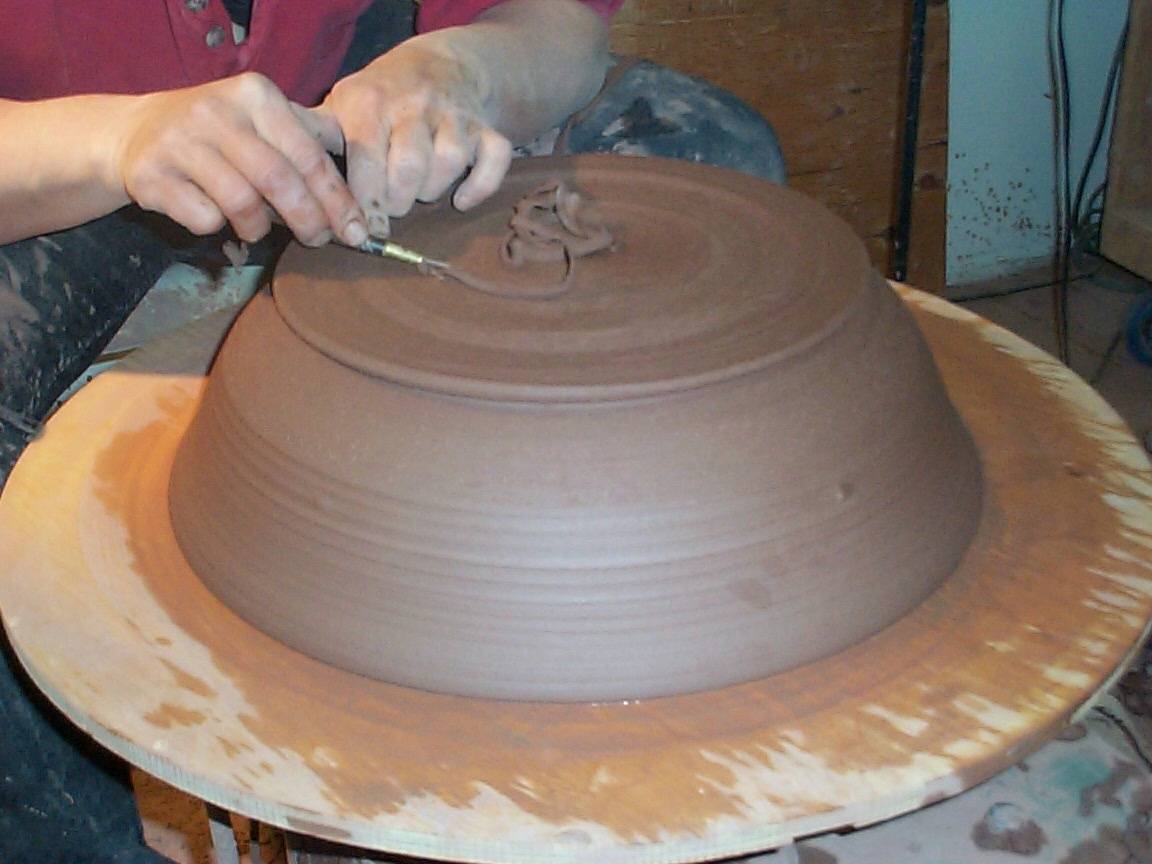
(Click for a larger image)
Cindy demonstrates trimming a bowl on the wheel.
Once the pot is trimmed it is again set on the shelf to dry. This will take several days for a bowl this size as the drying rate must be carefully controlled to prevent cracking. We have found these bakers racks are ideal for drying as they allow a uniform air flow around the pieces. Plastic sheets enclose the shelves and are adjusted to control the drying rate.

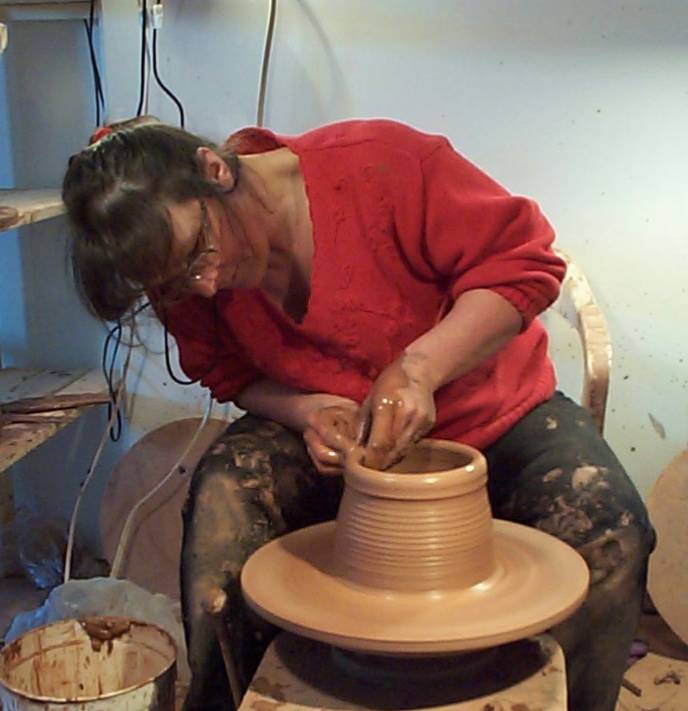
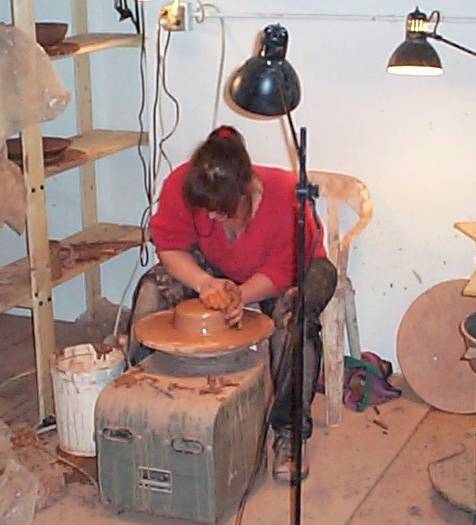
centreing
For wheel throwing , once the clay is pugged and wedged it is centered on the wheel. This is a very critical step as it is the foundation of the pot. The pot is only as true and as strong as the centering.
(Click for a larger image)
Cindy demonstrates how to center clay on the wheel.
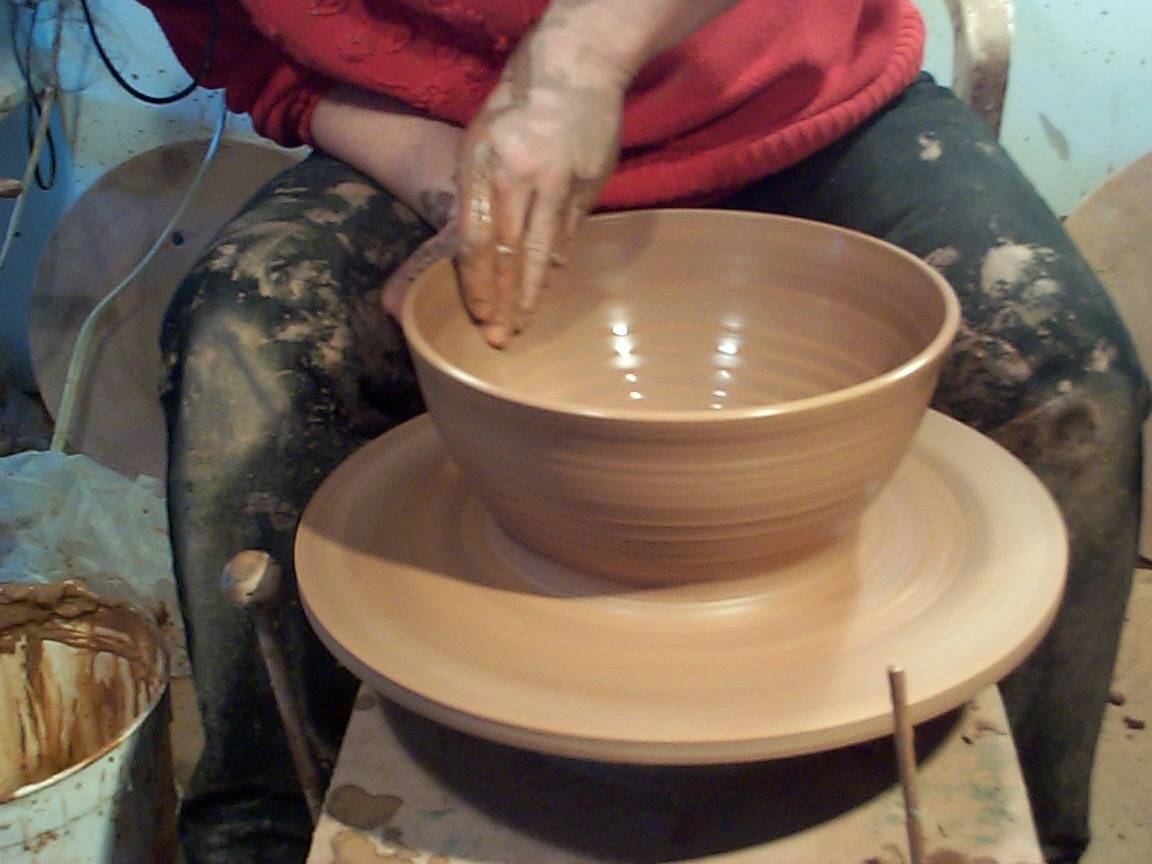
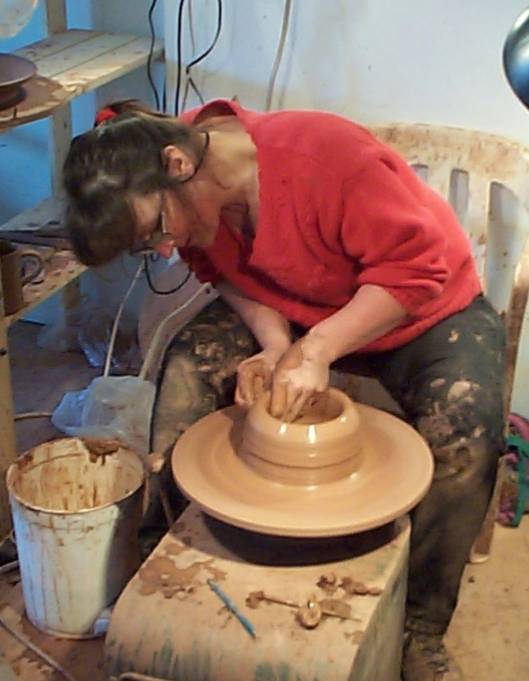
Opening
The next step is opening the centered clay so the potter's hands can begin to pull the clay up vertically from both inside and out.
(Click for a larger image)
Cindy demonstrates opening the clay .From our DVD "A Down to Earth Look at How We Make Pottery" Every wheel thrown pot comes from a cylinder. Vases are tall thin ones and plates are short fat ones but they all begin as a cylinder
How to Make Pottery
Here is a step by step look at how we make pottery. These are the steps we use every day in our studio. The process of making pottery at our studio is basically the same as you will find at any other true pottery studio in the world today. From raw clay to finished product we follow the steps that have been established over the centuries by potters on every continent. Every piece of pottery we make is hand crafted. We do not use the shortcut methods of press moulding, buying bisque ware from outside suppliers, or using mechanical devices to make the pots. Cindy does all the wheel throwing on an electric potter's wheel and all the slab pottery is built by hand. The only moulding we do is some slump moulding of platters, and even then each is made from a slab rolled on the slab roller and cut by hand before being draped into a mould.
Our clay is purchased from the Plainsman Clay Company which is located in Medicine Hat, Alberta. Plainsman processes clays from Alberta, British Columbia, and Saskatchewan, as well as Montana to provide raw materials for potters all over Western Canada. We work with different clay bodies depending on what we are building and to obtain a bisqued product with which our glazes will fit well. For wheel thrown pottery the red and brown clays are first "pugged" in a pug mill to thoroughly blend them. White clay is simply wedged straight from the box. Our pug mill was made for us by a local machinist and inventor, Guy Ells aka "Moonlight Manufacturing". This machine is made with two counter-rotating screw augers which take the clay we feed into the hopper and mix it thoroughly, then push it through a single 3" outlet pipe, accomplishing basically the same action as hand wedging. A good pug mill such as this forces almost all the air out of the clay. (Some more elaborate pug mills have vacuum pumps to try and remove every last bit of air.)
 (Click for a larger image)
Cindy demonstrates the use of the pugmill.
The clay is then briefly "wedged" by hand to establish a consistency in the raw materials and align the clay particles and remove any air left over from the pugging process. There are two types of wedging we use. Cindy favours the Japanese style of wedging she is using in this illustration. It enables her to wedge a large amount of clay at once but does require some practice to perfect the technique. A simpler type of wedging, forward or "Cow-head wedging", is often used by beginning potters as it is easy to do with a minimum of practice.
For slab building pottery we use the clay directly from the pug mill. The pugged clay is flattened by throwing it at an angle on a canvas covered table. It is then placed on a piece of canvas, a second piece of canvas is placed on top of it, and then the canvas and clay "sandwich" is run between the rollers of the slab roller to give a uniform thickness to the clay. (The slab roller is similar in action to the wringers on an old washing machine.)

(Click for a larger image)
The slab is then carried to a table where pieces are cut from it to be hand formed into pottery platters or sushi sets, for example. Once the cut pieces have set for awhile they are easier to form. Sometimes they may be dropped onto or into a form to give them a particular shape. This is called slump moulding.Once the piece has dried to "leather hardness" it is trimmed and sponged and is then ready to completely dry in preparation for the bisque firing.
Jeulmun pottery period
The Jeulmun Pottery Period is an archaeological era in Korean prehistory that dates to approximately 8000-1500 BC.[1][2][3][4][5] It is named after the decorated pottery vessels that form a large part of the pottery assemblage consistently over the above period, especially 4000-2000 BC. Jeulmun (Hangul: 즐문, Hanja: 櫛文) means "Comb-patterned". A boom in the archaeological excavations of Jeulmun Period sites since the mid-1990s has increased knowledge about this important formative period in the prehistory of East Asia.
The Jeulmun is significant for the origins of plant cultivation and sedentary societies in the Korean peninsula.[6][7][8] This period has sometimes been labelled as the "Korean Neolithic", but since intensive agriculture and evidence of European-style "Neolithic" lifestyle is sparse at best, such terminology is misleading.[9]
The Jeulmun was a period of hunting, gathering, and small-scale cultivation of plants.[10] Archaeologists sometimes refer to this life-style pattern as "broad-spectrum hunting-and-gathering".


Subscribe to:
Comments (Atom)